Simply put, ponying means to lead a horse alongside the horse you’re riding. On the trail, the task comes in handy when you’re training a new horse and helping him get used to obstacles and familiarizing him with the trail. When a horse follows another horse, his natural herd instincts kick in and he’s apt to follow his leader through terrain that might otherwise seem intimidating. While being ponied, a horse that’s never crossed water may walk straight in, or a horse that’s never left the arena can head out into the ever-changing scenery without nervousness. The best part is that the new horse can learn and experience spook-inducing objects and wide open country before a rider accompanies him on the journey.
You might also pony a horse that’s carrying supplies to a campsite, a horse that a child is riding (as a means to have a little extra control in addition to the child’s reins), a horse who’s been injured and needs exercise to recover, or a horse who’s owner experienced an accident or injury during a ride. There are countless scenarios where ponying comes in handy.
In each case, you’ll need to know how to keep you, your horse, and the ponied horse safe. It’s a complex task to carefully ride your own horse and pay attention to another—all while holding your reins in one hand and an extra rope in the other. Because it’s natural for horses to travel at speed while close to one another (imagine mustangs speeding across the plains), horses usually don’t mind the proximity. Once you know how to handle the ropes, ponying can be a natural and easy way to travel.
I’ll teach you how to pony a horse safely, and avoid the common pitfalls. You’ll know how to hold a rope and reins at the same time, and what to do if the horse being led moves into an unsafe position. I’ll also give you tips to keep the ponied horse moving along at the requested speed.
Exercise Prep
Before you begin, make sure your pony horse—the saddled horse you’ll ride—is comfortable with other horses riding nearby. Ask yourself if your pony horse pins his ears or turns away from other horses when you ride him in a group. If he does, he might not be a good candidate to lead another horse. Your pony horse should be easily controlled with one hand on the reins. If you have to reach down or ride two-handed when you ride alone, keep in mind that you won’t have an extra hand to hold onto the ponied horse’s rope.
Your pony horse should be a safe and reliable mount that doesn’t spook and is easily controlled. He should also allow ropes to touch his legs and tail without startling, and should be good at dragging logs without spooking at the object that’s following him. These skills will help ensure that your pony horse won’t be bothered by the proximity of another horse and the ponied horse’s rope.
The horse you’ll pony should be halter broke and lead well when you’re on the ground. If you need help with either horse’s manners, consult a professional horse trainer. You can also watch my educational training videos to teach your horse the manners he needs from the ground and under saddle.
Why you need it on the trail: Ponying a young horse can help expose him to new scenes and experiences before he totes a rider. He’ll learn to brave new feats while following a trusted and reliable leader and follow along more willingly than if he were alone.
It’s also good to make sure that your usual mount will accept another horse close to him and allow you to pony another horse in case you need to help out a child or injured friend during a long ride. If you plan long pack trips, you’ll find it helpful for an extra horse to carry needed gear or maybe you need to take along an extra horse. There are many reasons to pony, but it’s important to learn the safe techniques before you try.
What you’ll do: You’ll learn how to handle the ponied horse’s rope, how to cue the ponied horse to move forward, how to teach the ponied horse to stay in position, and how to approach new obstacles while ponying.
What you’ll need: A saddle with a rigid tree (not a flexible tree that may apply pressure unevenly across your horse’s back if the ponied horse pulls) and a bridle for the horse you’ll ride, a rope halter and 12-foot rope lead for the horse you’ll pony. Make sure you wear a pair of gloves to keep your hands free from rope burns if the ponied horse pulls.
Step 1: Know How to Hold
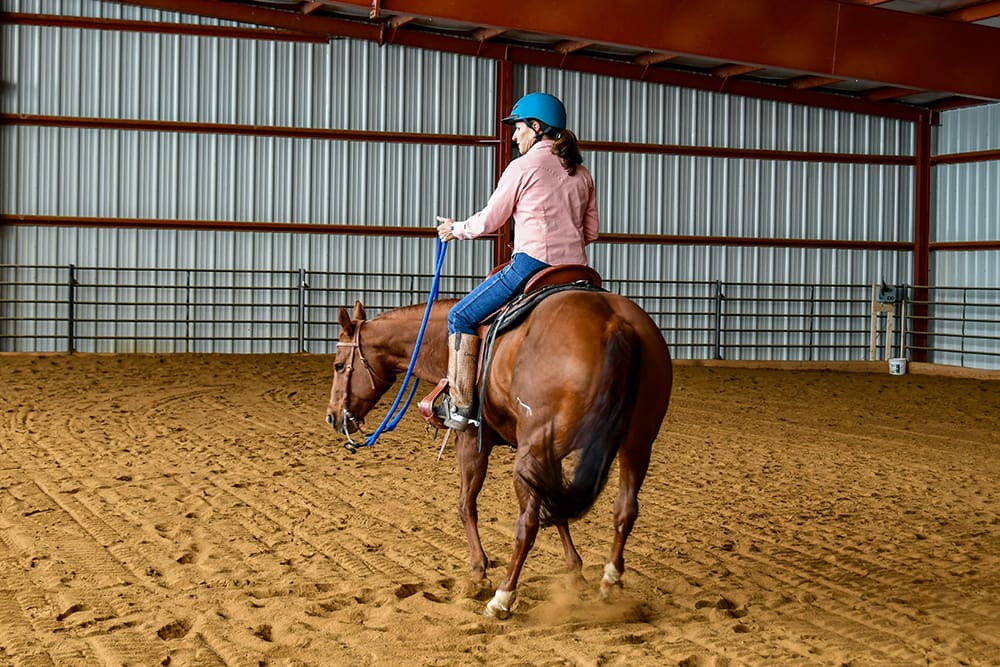
Outfit your pony horse and the horse you are leading (the ponied horse) in the tack listed above. With the horse you are leading standing on the right side of your pony horse, mount up while holding the lead rope and your reins in your left hand. As soon as you’re in the saddle, you’ll take the reins with your left hand and hold the ponied horse’s rope in your right. Always hold the ponied horse’s rope in a way that you can easily drop it if one horse slips or spooks—never tie or knot the two horses together.
Before you ask either horse to walk, make sure the ponied horse’s rope is doubled over—never wrapped around your hand—so that you can easily lengthen and shorten the rope. If the rope is safely doubled, you’ll see a loop in front of your knee as your hand rests on your leg.
Make sure not to hold the rope too far behind you. Too much slack allows the ponied horse to fall far behind the pony horse—precisely in kicking position. The loose rope can also tangle in the ponied horse’s legs or slip under his tail, potentially causing a big wreck. Simply keeping your hand on your leg and maintaining the correct hold on the rope will help you start safely before you take a step.
I will hold this rope and rein position as long as I am working with a young horse. By holding—instead of fully dallying the rope around the saddle horn—I can cue the ponied horse to move forward or back. I also ensure that the horses won’t be connected if the new ponied horse spooks. Once I know that the ponied horse is obeying and compliant, I often loop my rope lead one-half time around the saddle horn. This allows me to relax my grip and hold only one piece of the rope. The rope isn’t knotted and can quickly be released from the horn.
Step 2: Moving In Position
Ask your pony horse to walk on with your usual rein and leg aids. Make sure to include a voice command so that the ponied horse also hears the cue. With your right hand holding the rope and a place on your leg, allow the ponied horse to feel the rope’s gentle pull as you begin to walk. Because your ponied horse is halter broke, he should understand the same go-forward cue.
If the horse being led doesn’t come, don’t try to pull him forward with your arm—you don’t have enough strength and it could wrench your back or pull you off your horse. Get in the habit of stopping your pony horse anytime the horse being led balks. To teach him to move forward with you, take a half-wrap on the saddle horn, holding both ends of the rope in your right hand, down against your leg. Cue the pony horse forward and let his body weight pull the ponied horse forward. It’s pretty easy for the horse being led to pull against you, but he won’t pull long against the weight of the pony horse.
Caveat: at times like this, you are essentially riding two horses, so you need to have the skill and concentration to deal with two horses at once—asking one to slow down or turn while you’re asking the other horse to come forward.
Not all riders are ready for this kind of challenge. The mistake I hear about most often is forgetting to stop the pony horse and getting pulled off your horse by a spooky horse. If you lead a young or unseasoned horse out, make sure you’ve first practiced the position and your rope and rein holds with a calmer, more easy going mount.
I recommend keeping the ponied horse at your pony horse’s hip—close in without room for the horses to step in different directions around a tree or other obstacle.
Practice walking while maintaining your rope and rein hold. Begin by walking straight ahead, then gradually add turns to the right. Turn to the right before the left until you’re comfortable handling the rope and trust the ponied horse to follow. When you turn to the right, you’ll turn toward your ponied horse, allowing the rope to stay in position easily.
Turns to the left are tricky if the ponied horse isn’t keeping up to speed. Make sure the ponied horse is in the correct position before you turn left. If he falls behind, his rope can droop, touch your pony horse’s tail and even slide up under it, causing your pony horse undue stress and possibly creating a spook. If this were to happen, always turn your pony horse back to the right, to prevent the rope from wrapping around you. Drop the lead rope if necessary.
Step 3: Correcting Poor Position
If your ponied horse falls behind, simply gather your fingers along your doubled rope to shorten the line and pull him forward with a bumping action. Because the ponied horse knows how to lead on the ground, he should respect the same correction while you’re riding.
Make sure you don’t allow the ponied horse to move forward so much that he’s in front of your knee. You don’t have leverage to control him when he’s in the lead and he can start to lead the herd instead of naturally following your pony horse. If the horse you are leading moves too fast and too forward, pick up your rope-holding hand and jerk back, pointing the rope toward where you’d like him to be. A quick bump from your rope halter’s knot will correct your horse just like during groundwork sessions.
The best pony horses are often good teachers. My horse, Dually, knows right where the ponied horse should be and will turn his neck and threaten the ponied horse with his teeth if he moves up too far.
Step 4: Changing Pace and Scenes
Once the ponied horse is following along in formation, moving with your pony horse and doesn’t need constant corrections, begin asking both horses for gait changes. Put your horses to work as they transition from walk to trot. Each time you give a cue to your pony horse, make sure to use your verbal cue or a bump of the rope to spur on the horse you’re leading. Soon, your ponied horse will keep pace and easily stay in position as he moves in step.


