Dear Julie,
I have been riding and taking lessons for two years. I am steadily progressing but sometimes it seems like the further I get, the less I know! I was originally taught to squeeze with my legs to make the horse go and pick up on the reins to make him stop or slow down. Now I am riding with a new instructor, who I really like. He tells me I should be using my seat to ask the horse to stop and go, although he can’t seem to tell me how. What is the secret to using my seat instead of pulling on my horse’ mouth all the time?
Sitting it Out
Dear Sitting it Out,
I rode at a very high level as a youth competitor and it wasn’t until I was pretty far along in the game before I found about how to use aids correctly. In my youthful bravado I felt cheated that information had been withheld from me until the ripe old age of 14, but I am sure my trainers, in their wisdom, felt like they would teach me when I was ready to learn more theory and advanced use of the aids. Knowing the aids has influenced my teaching tremendously. I have always made it my goal to teach people more theory and advanced concepts early on in their riding. Here are some important concepts that I teach in every clinic. The info may help you put all of your training together.
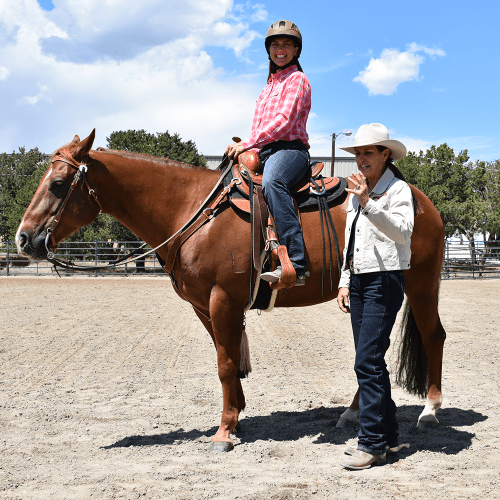 The natural aids are the best tools you have to communicate with the horse. Traditionally, there are four natural aids, the seat (weight), the legs, the hands and the rider’s voice. I prefer to teach riders that there are seven natural aids. In addition to the traditional four aids, I add the rider’s eyes (which assist in turning), the rider’s breathing (which helps for stop and go) and the rider’s brain (it helps to learn to think from the horse’s perspective). When all of these aids are used together, your horse receives clear and consistent communication—he’ll know what you want him to do.
All of the natural aids should be used in unison and should always originate–or be connected to–the use of the seat. No one aid gives a cue to the horse (you don’t stop by pulling on the reins or go just by kicking). All the aids working together will guide the horse toward the appropriate response.
Seat Aids
By far, the most important aid is your seat; it’s in the most contact with the horse. Not only are you sitting on a very sensitive part of your horse’s back, but you’re also positioned over his center of gravity. He can feel your shift of weight easily. Because your horse can feel every move, it makes sense to use your seat more than any other aid.
For instance, asking the horse to stop or slow down isn’t simply a matter of pulling back on the reins. To ask the horse to stop using all of the aids in a connected fashion, first you must drop your weight onto the horse’s back by opening and relaxing the pelvis and plugging your seat bones into the saddle. As your seat drops down on the horse’s back, a connection is made between your elbows and hip. Then the shift of your weight and opening of your pelvis will cause increased pressure on the horse’s mouth through your arms, hands and reins. In other words, the pressure the horse feels on his mouth is connected to the increased weight on his back and the pull comes from your entire body, not just from your hands.
Practice at Home
You can see how this feels by sitting in a chair pulled up to a table. With both feet flat on the floor and your back straight, put both hands on the edge of the table. As you exhale and rotate the seat bones down and forward (opening the pelvis and plugging the seat bones into the chair), pull on the edge of the table so that your seat bones get even heavier on the chair. This is how you cue the horse for a stop or to slow down by using your weight aid first.
The Gears of Your Seat
You have three gears to your seat: neutral, forward and reverse. Forward tells the horse to speed up; reverse tells the horse to slow down or stop. Neutral gear is that gear that you should ride in 99 percent of the time; neutral tells the horse to keep doing what he is doing, until you tell him something different.
That’s the way professional trainers teach horses to be obedient–once I tell you to walk, you should keep walking straight ahead until I tell you to slow down, speed up, turn right or turn left. You shouldn’t have to pedal your horse by constantly telling him to keep walking.
Neutral. For neutral gear, you’ll ride sitting straight up in correct position and in balance with the horse (ear-shoulder-hip-heel alignment). Make sure all of your weight is on your two seat bones and your pelvis is level. When you want the horse to speed up, you’ll shift your center of gravity slightly forward–so that your pelvis tips forward. Since you’re sitting right over your horse’s center of gravity when you’re in neutral, he can feel the shift in your weight just like you could if you were carrying someone piggyback.
Forward. You horse knows that when your center of gravity shifts forward you intend to speed up. Your hand and leg aids, simply follow along with what your seat is telling the horse. Keep in mind that the position of balance with the horse occurs when you have ear-shoulder-hip-heel alignment in your body; in neutral gear, that line is vertical; in forward gear, the line is canted slightly forward, causing your hands to give a release to the horse’s mouth, at the same time your legs move back and close on the horse’s sides. So all three of your primary natural aids, your seat, legs and hands, are giving a clear and connected cue to the horse.
Reverse. Reverse gear is basically the opposite of forward gear and tells the horse to stop or slow down. In reverse gear, you simply exhale, drop your shoulders down towards your hips and let your center of gravity fall back. As your pelvis tilts backwards, your seat bones sink forward and down, pressing into the horse’s back; your legs relax off of the horse’s sides and your hands come slightly up and back. Again, all of your primary aids are giving a clear and connected signal to slow down.
Now let’s use all the aids in a connected fashion to ask the horse to turn. First look in the direction of the turn–your eyes and body will initiate the turn. As your head turns slightly in the direction of the turn, your body will follow, swiveling slightly in the saddle and shifting your weight to your outside seat bone. Again, your legs and hands will follow the movement of your seat and not act independently. Your outside leg will sink down and close on the horse’s side, shutting the door to the outside.
Your inside leg will lift up slightly as the inside seat bone lightens, opening “the door” to the inside and keeping the horse’s inside shoulder elevated in an arcing turn. As your seat swivels slightly in the saddle in the turn, your elbows, arms and shoulders will follow (make sure your upper arms are in contact with your ribcage), giving a release with the outside rein and increased pressure to the inside rein, thus supporting the horse’s head, neck and shoulders in the turn.
Using your whole body to communicate with your horse–having all of the aids combining to provide an exact signal– is a very effective and results in what looks like invisible cueing and seamless transitions. These concepts are explained in more detail in my training videos, Goodnight’s Principles of Riding, Volume 1-5. Volume 3 in this series, Perfect Practice, includes 24 different mounted and unmounted exercises to improve your balance and communication. Volumes 2 and 4 (Communication and Control and Refinement and Collection) explain basic use of the aids as well as advanced use of the aids. Get the pictured Circle Y Saddle HERE

