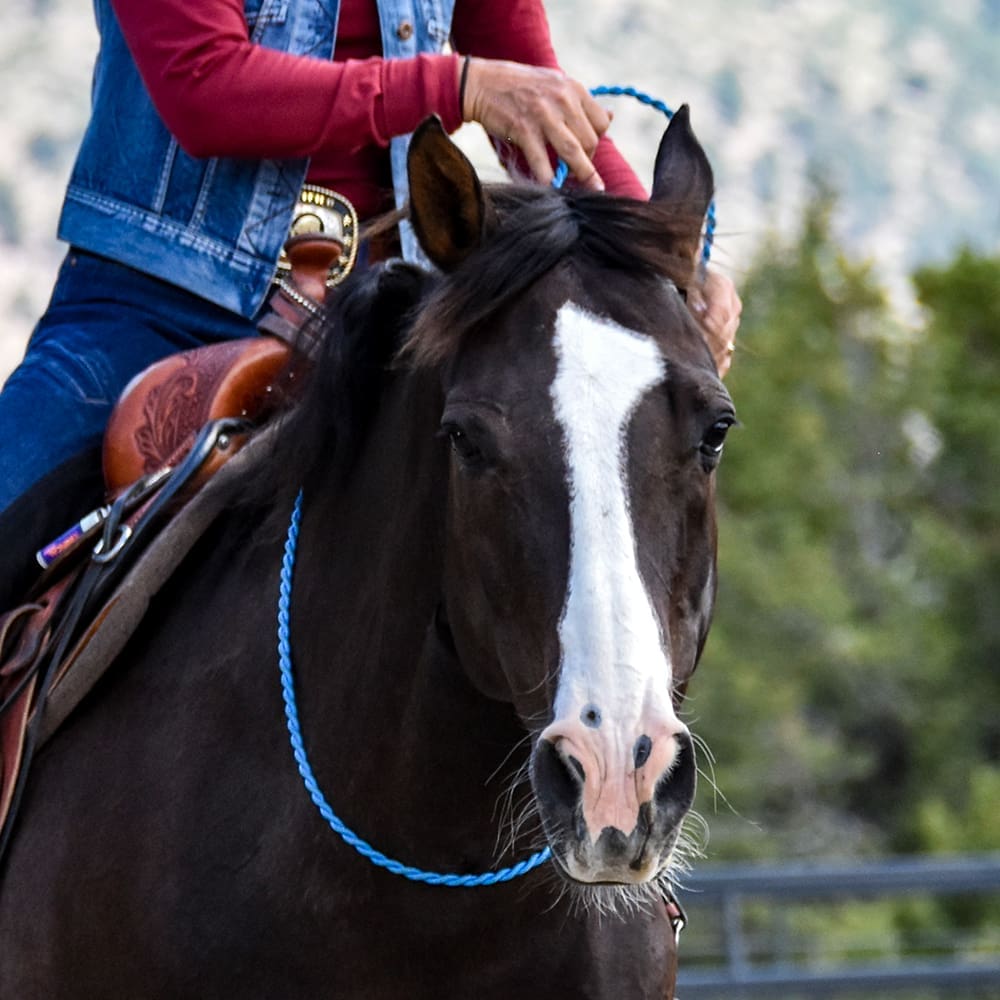
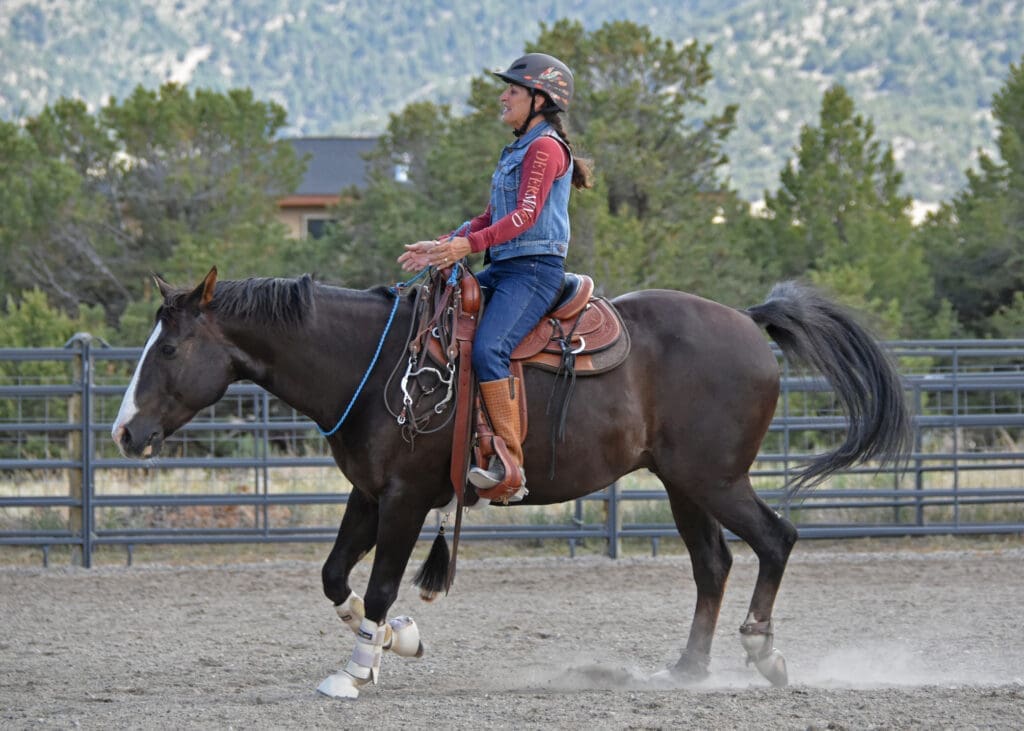
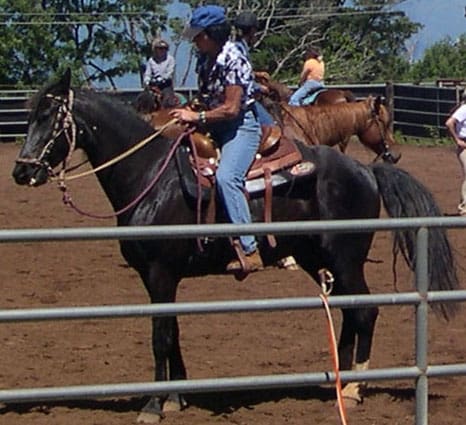
Julie talks about what you need to know before you even think about taking off the bridle.
See the PDF>>Bridleless Preparation PDF
Julie talks about what you need to know before you even think about taking off the bridle.
See the PDF>>Bridleless Preparation PDF
Bridle-less Riding
To me, the ultimate sign of true unity, trust and respect between a horse and the rider is when you can remove the bridle, have nothing on his head, and have the horse perform as well or better than he did in the bridle.
While I do believe you need the bridle to train your horse to a high level, once your horse has proven himself to be obedient and responsive, it is not the bit that is making him act that way. Most well-trained horses will work as well or better without the bridle; but not all horses.
The ideal bridle-less horse is well-tempered and well-trained. He has a calm and willing attitude, a strong work ethic, good manners and he hates to get in trouble. He tries hard most of the time and is sensitive to the aids of the rider. He accepts your authority and generally tries to please you. Although no horse is perfectly behaved all of the time, the ideal bridle-less horse is well-behaved almost all of the time.
Before riding bridle-less, you should be an advanced rider, comfortable at the walk, trot and canter, in an arena and out in the open. Your position should be good, with ear-shoulder-hip-heel alignment, with a soft and relaxed back and low and relaxed arms. You should have good knowledge on how to use your natural aids effectively and especially how to use your seat/weight as the primary aid. You should have a good understanding of how to use your leg aids in different positions to control different parts of the horse’s body.
If you need to work on your riding in these areas, my riding DVD series, Goodnight Principles of Riding will fill in all the gaps.
You don’t just take the bridle off one day–there is much preparation work that must be done. Take your time and go through all of the steps. If you have any doubts about your horse’s obedience or responsiveness, do not move on to the next step. Keep working where you are until you have complete confidence in your horse.
Your time frame for accomplishing all of these steps depends entirely on how well-trained and obedient your horse is, how effective you are as a rider and how reliant you are on your hands for control. Realistically, I’d expect you to spend at least a week at each step but it could take you much longer if your horse is green or if you find your horse is not as obedient as you thought. Be sure to read the caveats at the end of the outline to help you avoid mistakes along the way.
No matter how long it takes–a month, a year or longer–you’ll be making progress at each step and you’ll enjoy the journey. When you get to the point that you take off the bridle, it is incredibly exhilarating and rewarding–that’s when the fun really begins!
Good luck and be safe!
Julie
Step One: Preparation and Obedience
a) This is the longest stage of training for bridle-less riding. For me, it begins on my first ride with the horse and depending on the horse’s level of training and how well he’s been handled (how much he has gotten away with), it may go faster or slower.
b) Before riding bridle-less, you must have 100% authority over your horse. If he challenges your cues, if you regularly reprimand him, if he spooks, speeds up or slows down without a cue from you, if he cuts corners or veers off-course, pulls toward the barn or is herd bound or if he is simply is so green that he doesn’t understand cues and basic obedience, you will be spending a long, long time at this phase.
c) What is obedience? A well trained and obedient horse goes in the direction you dictate, at the speed you dictate, without question or compromise or challenge to your complete authority. If you have to constantly correct the horse’s speed and direction, he is not obedient. An obedient horse should not be co-dependent with the rider. For instance if your horse will only stay on the rail because you constantly pull his head to the rail–you have a co-dependent relationship, your horse is constantly challenging your authority and you are constantly enabling him. If you find that your horse is not 100% obedient, you have a lot of work ahead and the longer he has been allowed to act this way, the longer it will take to fix. Visit my Training Library for information on more remedial training. You must address these obedience issues before moving forward.
d) To test your riding and your horse’s obedience while riding in an arena, simply put him on the rail at a walk and once you have him headed down the long side, just drop your hands down on his neck (I usually wrap one of my fingers around the saddle pad to make sure my hands stay there), thereby negating the use of your hands. If he stays on the path you dictated and does not change speed, you have an obedient horse! If he doesn’t, drop your hands, expect him to continue on the path and reprimand him when he doesn’t. Find the amount of pressure that makes him think harder about being obedient and then immediately drop your hands back down on his neck and expect him to stay on course. Continue correcting him until he stays on course with your hands down on his neck.
e) Next, with your hands still down on the neck, see if you can make some reverses, circles and ride interior lines of the arena like coming down the centerline or across the diagonal. Your goal is that you can do all of this without ever picking up your hands from his neck. If you can steer around the arena without using your hands, you are ready for the next phase. If not, you need to continue to work on developing body cues for turning and straightness that do not involve the reins.
Step Two: Loose Rein Riding/Hands Down
a) Remember, once you lose the bridle, you cannot really control the nose of the horse and collection becomes extremely difficult, some would say impossible (which is why my horse loves to go bridle-less so much–total freedom of his nose and no collected work!). So in preparation for bridle-less work, you will have to ride a lot on a totally loose rein–draping in slack. You will have to drop your hands down on the neck or saddle pad to neutralize your hands so that you can develop more control with your seat and legs.
b) Riding with the bridle, your horse learns to listen only for the rein cues, not bothering to concentrate or listen more closely to your other aids, because the reins will always tell him what to do. In fact, if you’ve been riding with your reins as your primary aid–as most riders do, your horse may have learned not to listen to your other aids at all but just wait until he feels his mouth pulled on. Now you have to re-program your horse that the reins will be the last aid you use and then only if needed for reinforcement when he doesn’t listen to your other aids. Read that sentence again and make sure you understand it. From this point forward, all of your cueing will come from your seat and legs and you will only pick up the reins as reinforcement when the horse does not listen to your seat and leg cues. If the reins always come last in your cueing sequence, soon you will not need them.
c) Steering: with your hands down on the neck, you’ll have to use all of your other aids and your whole body to signal a turn to your horse. Turn and look in the direction of the turn, open your shoulders in the turn, twist through your torso so that you feel your outside leg wrap around your horse’s ribs and your outside seat bone becomes weighted. To help your horse clearly understand the cue to turn, you should also open with your inside leg–think of drawing your horse toward the turn with your inside foot. Be very careful NOT to lean in the direction of the turn–that will confuse your horse and block his turn. Tap your outside fingers on his withers if he isn’t listening before you pick up the reins to correct.
d) Practice reverses, circles and straight lines; first at the walk and then at the trot with your reins very loose and your hands down on the saddle pad or touching his neck. If you are confused about how to use your body correctly in the turns, you should watch volume 2 in my riding series: Communication and Control in the Saddle.
e) Speed control: the cues for going faster, or upward transitions, are not a problem when you are not using the reins–it’s the downward transitions that can be difficult. Before riding bridle-less, you should have a clear understanding of how to use your seat to slow down or stop your horse. If not, consult my online Training Library or watch volume 2 in my riding series. See the section below about developing cues that don’t involve the reins.
f) Practice many upward and downward transitions with a loose rein and your hands down on the neck–making sure you do not pick up your hands, except in correction if the horse misses the cue. Practice walk-trot-walk transitions, trot-canter-trot, trot-halt-trot and canter to halt. Your goal is to never have to lift your hands off the neck to slow down or stop. See the section below for developing better speed control without the reins.
Step Three: Tie Reins to Saddle
a) In this stage, you will do all the things you did previously but with the reins actually tied up–attached to your horn or saddle. BUT KEEP YOUR HANDS IN THE NORMAL REIN POSITION–JUST IN FRONT OF THE SADDLE. Do not throw away your hands and arms by dropping them down to your side–YOUR HORSE GETS VALUABLE INFORMATION ON WHAT YOU ARE ASKING HIM TO DO BY THE MOVEMENT AND POSITION OF YOUR ARMS. You have trained him to listen for cues with your arms in very specific positions when they were holding reins–if you change your arm position you will drastically change the cue the horse knows. Even when riding without the bridle, your hands will remain in proper position, making the same movements as if they were attached to reins.
b) Practice the same turning, circling, straight lines and patterns that you did in the previous step.
c) Practice stopping and slowing down at all gaits.
d) Developing special cues for riding bridle-less: The cues that are the most difficult to do without the bridle are turning, stopping, slowing down and backing. There are a few special things you can do to help make these cues easier for your horse to understand without reins…
Step Four: Use the Neck Rope
See Julie’s instructions for using the neck rope>>
a) After completing all of the steps above, you’re ready to lose the bridle but you have one more step to make sure you are safe and have control before taking off the bridle.
b) With the reins tied up and stowed safely away, put your neck rope on, adjusted so that there is a loop around his neck that is loose enough for you to hold onto but not so loose that it hangs down and interferes with his shoulders (like an ill-fitted breast collar). Hold the neck rope in two hands, keeping your hands low down by the neck.
c) You can use the neck rope to turn, stop, slow down or back up. Remember, don’t just trade reins for the neck rope. Try to ride using your seat legs and arm position to cue the horse and only using the neck rope if needed for reinforcement when your horse needs help hearing your cues.
d) With the neck rope, you should find that you actually have MORE control than you did when you had the reins tied up and nothing in your hands. You can slide the rope up the neck when you need more turning or stopping power. IF YOU DO NOT FEEL LIKE YOU HAVE PLENTY OF CONTROL WITH THE NECK ROPE TO TURN, STOP, SLOW DOWN OR BACK-UP, do not take the bridle off yet and continue to work on all the previous stages. You should not have any doubts at this point about taking off the bridle. If you do, keep practicing with the bridle on.
Step Five: Take Off Bridle
a) This is the stage you’ve been waiting for! When everything falls into place and you have accomplished all of the stages detailed above, you are ready to remove the bridle and have the ultimate ride on your horse. There is nothing that matches the trust and unity you display when you ride without a bridle or without anything on the horse’s head.
b) Make sure you always warm up with the bridle and put your horse through some paces, focusing on his absolute obedience and responsiveness. Only remove the bridle when you have the neck rope on and feel that your horse is working well.
c) When you first remove the bridle, start with asking your horse to do simple stuff that he knows well. Avoid the more difficult maneuvers until you are confident in your horse’s response. Always check your brakes before stepping on the gas pedal.
d) Your horse needs LOTS of praise and comfort (rest) when working without the bridle. Remember, he has to concentrate harder on your signals to figure out what you want.
e) A normal bridle-less riding session would begin with the bridle, focusing on your horse’s obedience and responsiveness with minimal use of the reins. Then take off the bridle, using the neck rope as needed, making simple transitions and patterns. As you gain confidence, attempt more difficult maneuvers but only after practicing them with the bridle first.
f) Be careful not to push your horse into the point of disobedience or cheating without the bridle. If you become too demanding or take off the bridle at times that you horse is not working his best, he may figure out that he does not have to be obedient without the bridle. This would be a tragedy. Always go back to schooling with the bridle and monitor your horse for signs of cheating.
CAVEATS: